How to Compile a Document with Multiple Images and Text
Step-by-step instructions on compiling a document with multiple images and text using Google Docs and Google Slides.
*Note: The process to create a document with images using MS Word or Apple Pages is very similar to the Google Doc process outlined below.
- Paste an image into your Google Doc or use the Upload from computer option in the top menu to insert an image saved to your computer.

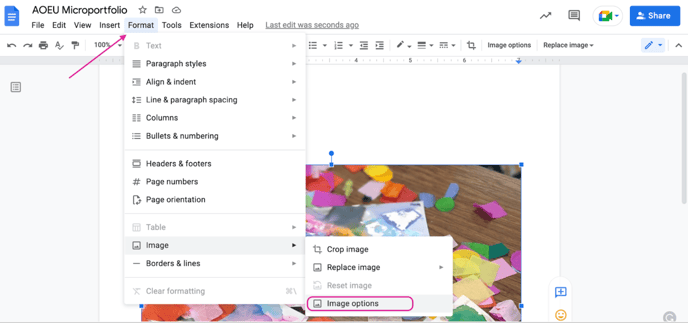
- To make changes to your image’s formatting or size, click the image and select Format > Image > Image options from the top menu.

- Type text above or below the image. Use the formatting toolbar to adjust the font size, color, and formatting.
- Repeat steps 1-3 for each image you include in the document.
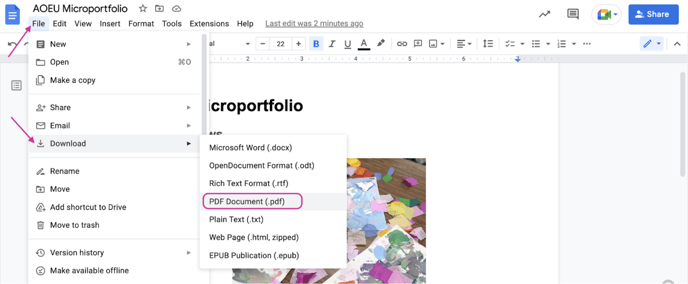
- When you are finished, save your file as a PDF by selecting file> Download > PDF Document (.pdf).

Using Google Slides
*Note: The process to create a document with images using MS Powerpoint or Apple Keynote is very similar to the Google Slides process outlined below.
- Paste an image onto a blank slide or use the Upload from computer option in the top menu to insert an image saved to your computer.

- To make changes to your image’s formatting or size, click the image and click Format options in the top toolbar.

- Select the text box icon in the top toolbar and then click anywhere in the slide to insert a text box in that location.

- Type or paste the text into the text box.
- Use the formatting toolbar to adjust the font size, color, and formatting.

- Add a new slide to your presentation and repeat steps 1-5 for each image you include in the document.
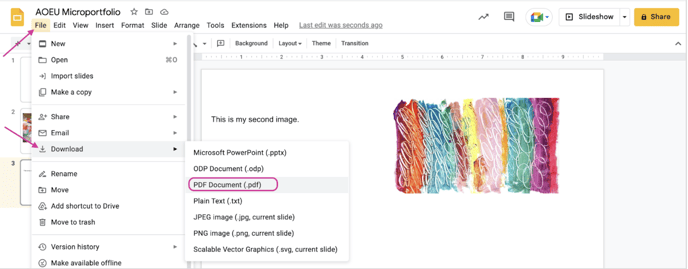
- When you are finished, save your file as a PDF by selecting file> Download > PDF Document (.pdf).

